

Getting started
1. Create an account
Section titled “1. Create an account”- Open the platform and click Register.
- Enter first name, last name, email and password.
- Confirm your email address via the link in the confirmation mail — you cannot create an organization without a verified email.
2. Create your organization
Section titled “2. Create your organization”- In the dashboard, click Create organization.
- Choose a name and a subdomain — the subdomain becomes your website address
(
yourclub.moep.cloud) and cannot be changed freely later, so choose carefully. - Optionally add a short description.
You automatically become the owner of the new organization.
3. Design & branding
Section titled “3. Design & branding”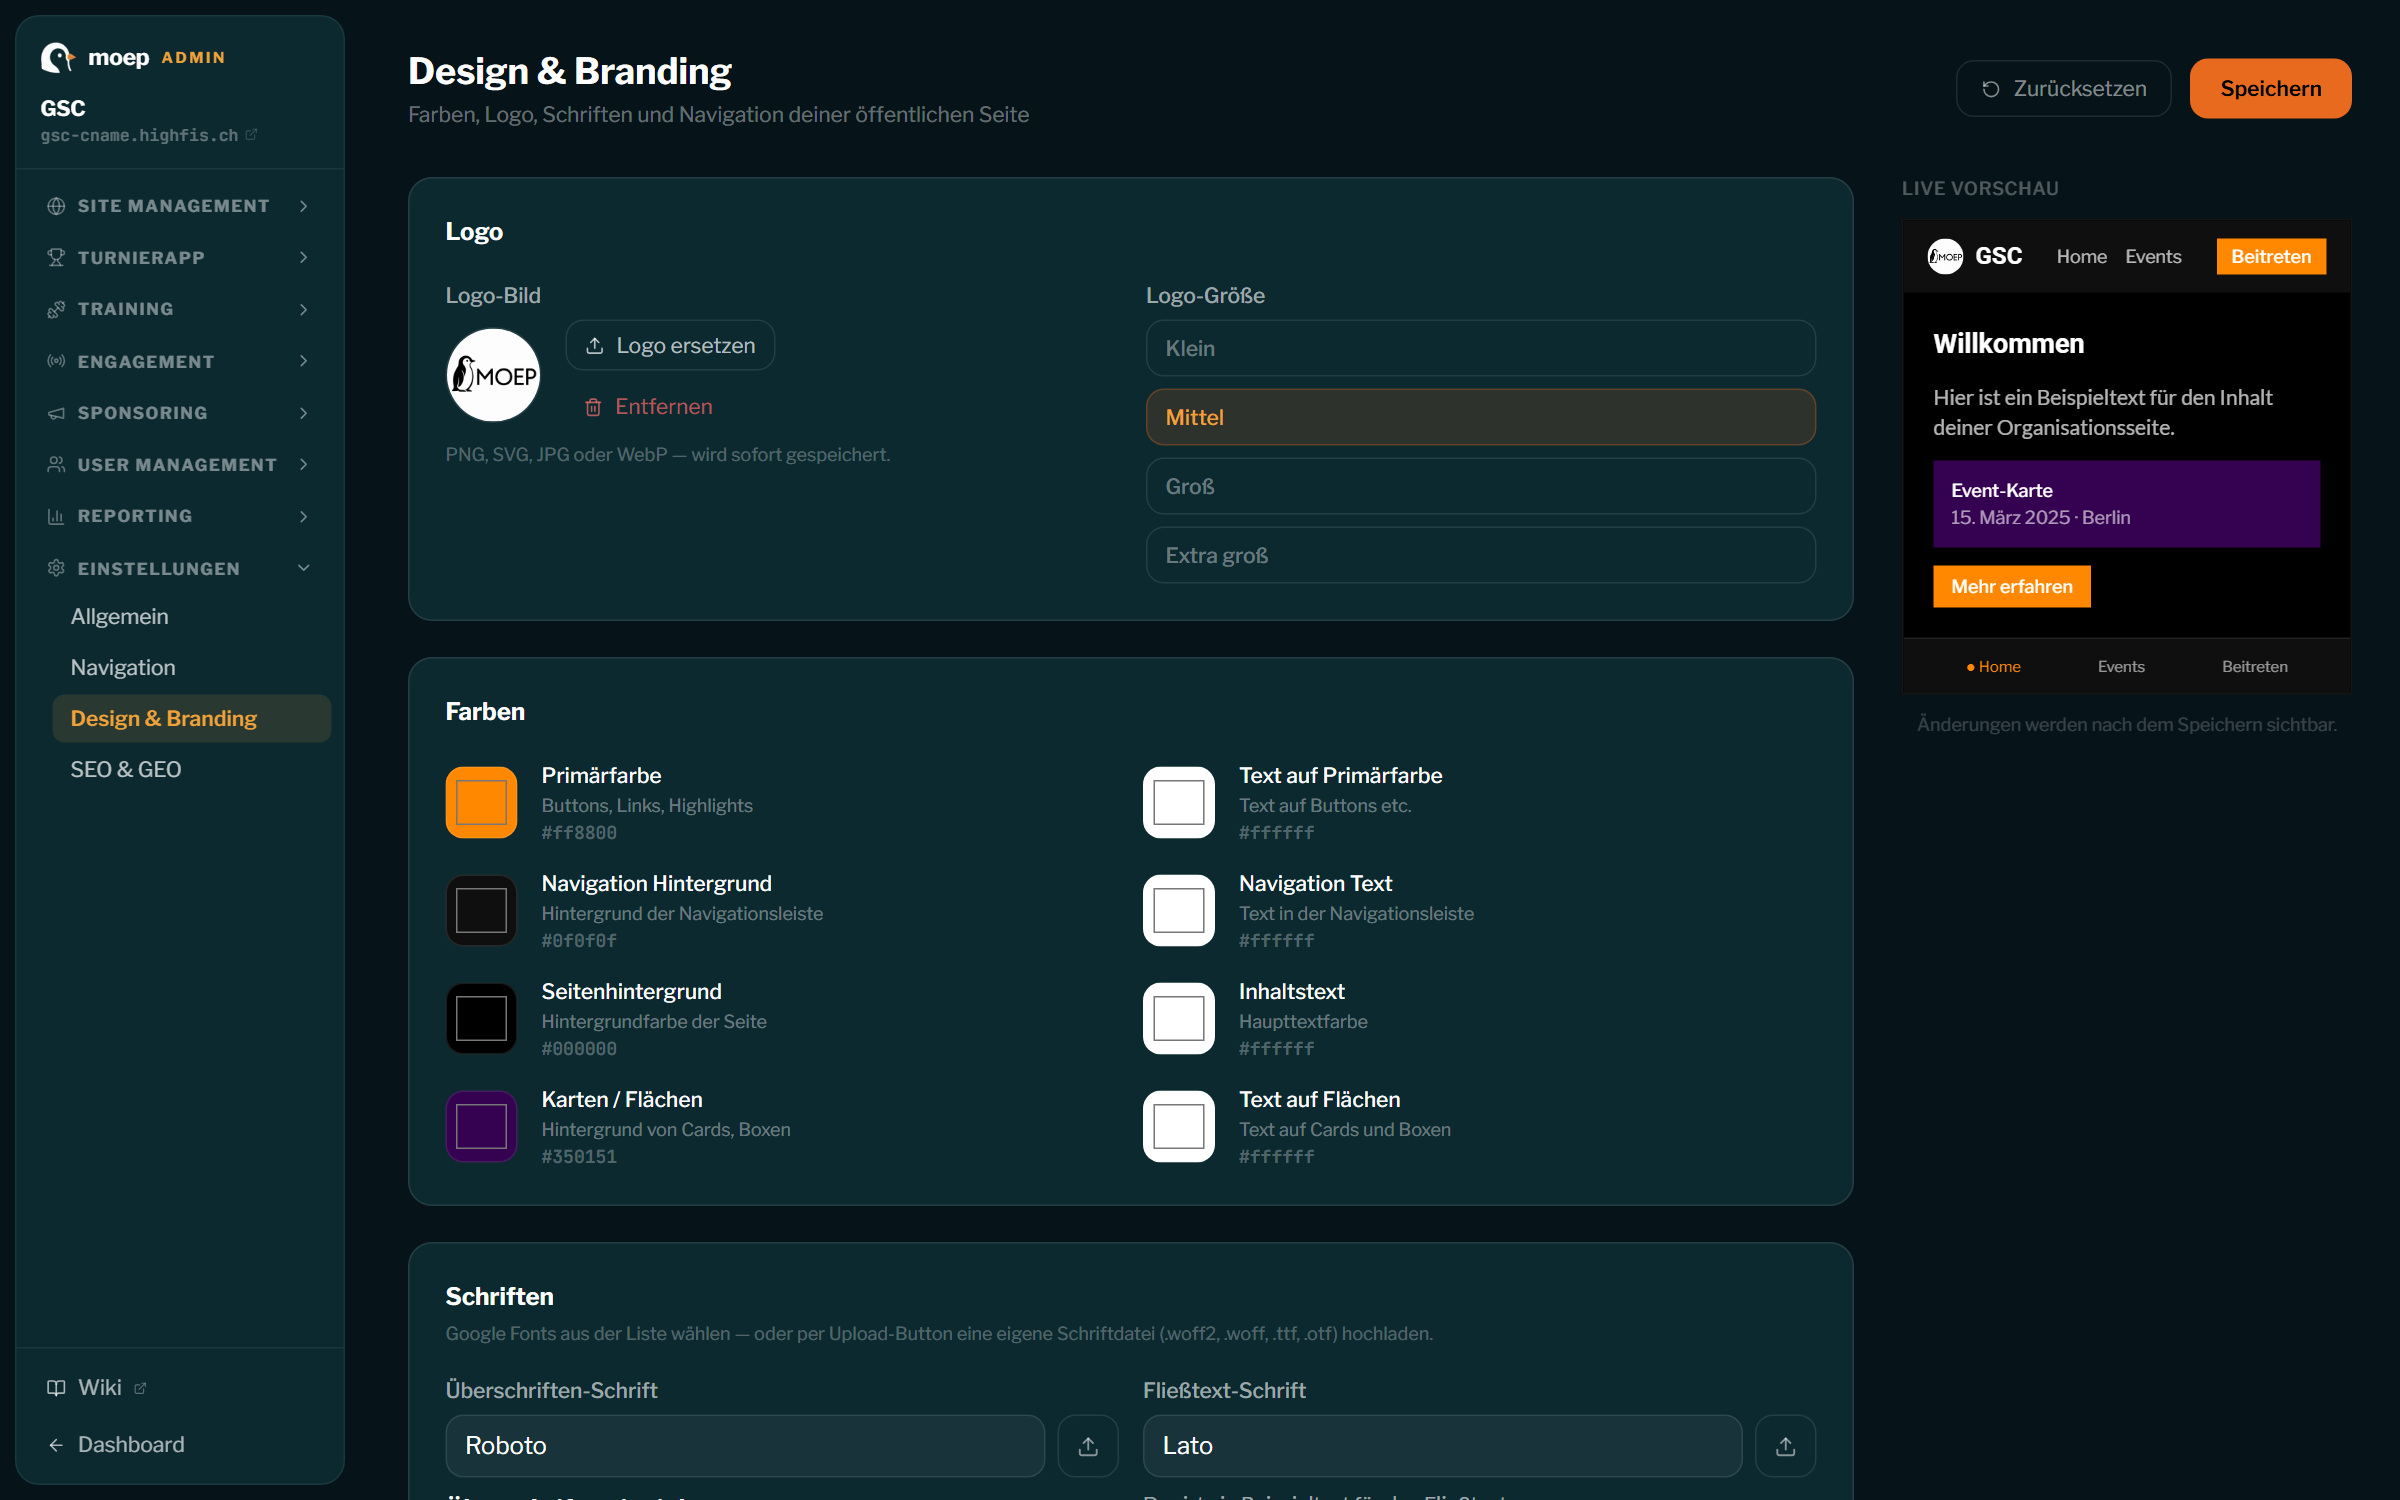
Under Settings → Design & Branding you control the look of your public website:
- Logo and logo size
- Colors (primary, navigation, background, surfaces)
- Fonts (Google Fonts or your own font files)
- Design style (modern / classic / minimal)
- Content width (full, wide, centered)
The live preview on the right shows the effect immediately. The four club templates (see the setup assistant) are a great starting point with ready-made design and page sets.
Navigation
Section titled “Navigation”Under Settings → Navigation you configure the entire main navigation. There are two surfaces, each with its own item list, switchable on and off independently:
- TopNav — the header bar. When it is off, the bar with your logo stays, just without a menu. For desktop and mobile you each choose: show entries, burger menu or no menu.
- AppNav — the fixed bar at the very bottom with icons. It has its own item list (independent of the TopNav) and shows the first 5 of them.
You maintain both lists separately. Every navigation item has a label, a target, visibility (public / members / a specific role — enforced server-side) and two switches:
- Highlight — the item renders as a bold button in your primary colour (the way the fixed “Join” button used to look). Default: off.
- Show on mobile — default: on. Off means the item only appears on desktop.
Sub-items: every TopNav item can have sub-items (one level). On desktop they appear as a dropdown, in the burger menu indented below. Leave the parent target empty to make it a pure menu title (e.g. “Club”). Sub-items have their own visibility — a members-only sub-item stays hidden from guests, and a menu title disappears entirely when no sub-item is left for that visitor. The AppNav is an icon bar and has no sub-items.
The Join button is now an ordinary list item (/join) — you can rename it, move it, hide
it or turn off its highlight.
4. Members & roles
Section titled “4. Members & roles”Under User management → Members:
- Invite via email or invite link; after registering and accepting, the person automatically becomes a member.
- People without an account can be added by name (e.g. for team lists) and invited later — on acceptance they are automatically converted into real members.
- Every member holds a set of roles: system roles (owner, administrator, member), module roles (e.g. trainer, judge) and custom roles with granular permissions (User management → Roles).
- The owner role is protected and only moves via ownership transfer.
→ All the details on roles, permissions and the member editor: Users & roles
5. Modules
Section titled “5. Modules”Tournament app, Training and Engagement are active from the start for new organizations — they appear directly in the dashboard navigation, including their module roles. Sponsoring & ads is tied to the Pro plan: upgrading enables the module automatically, and switching back to Free disables it again. The platform team can additionally enable or disable modules per organization.
6. Languages
Section titled “6. Languages”- Your language: Under Profile → Language you pick the language of the user interface (Deutsch, English, …). It applies wherever you are signed in — and system emails arrive in your language.
- Organization languages: Under Settings → Languages you set the main language of your public website and enable additional languages. For enabled languages, translation tabs appear in news/blog articles and in page widgets — and the website shows visitors a language selector in the navigation menu listing exactly those languages (with a single language it disappears). The choice applies to the whole site and survives navigation. Empty translations automatically fall back to the main language; the interface itself exists in German and English, other languages show it in the main language.
7. Free vs. Pro
Section titled “7. Free vs. Pro”Your organization’s plan (Free/Pro) controls extra features such as sponsoring/ads, reporting and custom domains. Connect a custom domain under Settings → General via a CNAME to your subdomain — the certificate is issued automatically.